Klipper

 **What if your Klipper printer could keep track of which spool is loaded and how much filament is remaining?** - Do you wish your printer could keep track of the filament remaining on each spool automatically for you? - Do you want it to automatically switch to the correct spool when you load one? - Do you wish your printer would warn you when you have PLA loaded and try to print an ABS gcode? Does that sound like something you need? Read on below: [Spoolman](https://github.com/Donkie/Spoolman) is the project for you! It was created by Donkie (not myself) and it has official support in moonraker. Additionally the Fluidd, Mainsail and KlipperScreen UIs also integrate its functionality. Octoprint is not supported at the time of writing. Even without a compatible UI spools can be selected using macros or calls to the moonraker API. Installation is fairly straight-forward, but some Klipper users may not be familiar with docker so it can seem rather intimidating. I've written out a short guide to help you get started: ## Setup I don't ***think*** the spoolman software is very resource-intensive, but I personally installed it on a separate system from my pi. You will likely be fine to install it on the pi in most cases though. To begin, you need to install docker/docker-compose: ```bash sudo apt update sudo apt -y install docker-compose ``` Then create a directory for spoolman: ```bash mkdir ~/spoolman cd ~/spoolman ``` Create a docker-compose config: ```bash nano ~/spoolman/docker-compose.yml ``` **docker-compose.yml:** ```docker version: '3.3' services: spoolman: image: ghcr.io/donkie/spoolman:latest restart: unless-stopped volumes: - ./data:/home/ubuntu/.local/share/spoolman ports: - "7912:8000" environment: - TZ=America/New_York # Optional, defaults to UTC ``` You may want to change the timezone. A list is available [here](https://docs.diladele.com/docker/timezones.html) Then run: ```bash sudo docker-compose up -d ``` You should now be able to access the interface at http://ipaddress:7912 (replace `ipaddress` with your pi/host's ip address) Create your first Vendor, Filament, and then Spool in the UI there. When I tried to configure moonraker in the next step it failed without an initial spool existing in the database, so I wouldn't skip this. ## Configuration Now we need to configure moonraker to use spoolman. Pop open your `moonraker.conf` file and add the following: ```ini # enables spool management [spoolman] server: http://ipaddress:7912 # URL to the Spoolman instance. This parameter must be provided. sync_rate: 5 # The interval, in seconds, between sync requests with the # Spoolman server. The default is 5. ``` Once again, we need to replace `ipaddress` with the ip address of the host system. If it is the same as the pi (the one running moonraker) you can also simply use `localhost` instead Restart moonraker and reload Fluidd/mainsail/etc and you should now see a `spoolman` section on the dashboard. You can also verify in your `moonraker.log` file, look for a line like this: ```2023-08-08 10:53:43,664 [server.py:load_component()] - Component (spoolman) loaded``` Remember, even without using a compatible UI, Klipper/moonraker will still track filament use against the last spool selected. We can also add commands that allow us to select the spool regardless of the UI: **printer.cfg**: ```ini [gcode_macro SET_ACTIVE_SPOOL] gcode: {% if params.ID %} {% set id = params.ID|int %} {action_call_remote_method( "spoolman_set_active_spool", spool_id=id )} {% else %} {action_respond_info("Parameter 'ID' is required")} {% endif %} [gcode_macro CLEAR_ACTIVE_SPOOL] gcode: {action_call_remote_method( "spoolman_set_active_spool", spool_id=None )} ``` These commands can be used like ```SET_ACTIVE_SPOOL ID=5``` and ```CLEAR_ACTIVE_SPOOL``` to select (or clear) the spool. Spools are selected by spool-id, which you can see on the spoolman UI where you create new spools. These commands can even be used in your "Custom Filament Gcode" in the slicer to allow filament profiles to select spools automatically. Mainsail/Fluidd allow for integration with the klipper/crowsnest webcam to scan qrcodes from spools and automatically select the proper spool at the start of a print/etc. QRcodes can be printed from the spoolman web UI. If you are not using mainsail/fluidd or you want it to function without the UI, I wrote a small script that will scan qrcodes from klipper cameras and command spoolman to select the spool it identifies. This can be triggered from a macro which allows you to put it in your start gcode. The code and instructions are below: ## Scanning Spool QRcodes This functionality requires you to install the `zbar-tools` package for scanning codes and [the gcode_shell_command Klipper extension](https://github.com/dw-0/kiauh/blob/master/docs/gcode_shell_command.md) to allow klipper to trigger shell scripts. ```bash # Install zbar-tools for reading qrcodes sudo apt install zbar-tools # Install gcode_shell_command to run scripts from klipper macros cd /home/pi/klipper/klippy/extras/ wget https://raw.githubusercontent.com/th33xitus/kiauh/master/resources/gcode_shell_command.py ``` Then we add some config to our klipper config file: **printer.cfg** ```ini [gcode_shell_command qrcode_qrscanner] ## NOTE: Change the path below if your klipper config is not in the default path ## command: sh /home/pi/printer_data/config/qrcodespoolman.sh verbose: True timeout: 2. [gcode_macro QRCode_Scan] gcode: RUN_SHELL_COMMAND CMD=qrcode_qrscanner ``` And create a shell script: **qrcodespoolman.sh** (place in your config folder next to printer.cfg) ```shell #!/bin/sh ########################################## WARNING: ############################################## ### This script assumes you are using a crowsnest webcam on the same host and the first camera ### ### Adjust the paths and addresses below as needed to work with your configuration ### ################################################################################################## ## Capture a snapshot from the camera and store it in a jpg file wget http://localhost/webcam/?action=snapshot -O /home/pi/printer_data/gcodes/qrcode.jpg ## Read any QRcodes from the image and strip just the spool-id from the data in the code SPOOLID=$(zbarimg -S*.enable /home/pi/printer_data/gcodes/qrcode.jpg | sed 's/[^0-9]*\([0-9]\+\).*/\1/') ## Return the spool-id in the console (this is mostly for debugging purposes) echo $SPOOLID ## Make an API call to spoolman selecting the spool that matches the spool-id curl -X POST -H "Content-Type: application/json" -d "{\"spool_id\": \"$SPOOLID\"}" http://localhost:7125/server/spoolman/spool_id ``` Please read through the comments in those snippets, particularly if your klipper config is not located in `/home/pi/printer_data/config` or your camera is not connected to the same machine. You may need to make adjustments to fit your machine. The paths and addresses used in the example should work for anyone using a pi with a single printer and the first/only camera configured in crowsnest. If all goes well you should now be able to trigger this action with the following command: ```QRCODE_SCAN``` You can place that in your start gcode to have it triggered at the start of every print. The command does the following: - Triggers the qrcode script, which does the rest: - Asks moonraker for a snapshot from the webcam - Locates and scans any qrcode in the image - Strips out any data in the qrcode except for the spool id - Tells moonraker to tell spoolman to select that spool id ## Updating Spoolman To update your spoolman instance, assuming you have installed in `~/spoolman`, you can use the following command: ```bash cd ~/spoolman;sudo docker-compose stop;sudo docker-compose pull;sudo docker-compose up -d ``` > NOTE: Avoid using `docker-compose down` as it will wipe out the storage volumes, likely taking your spool database with it. > > You also may want to consider using [watchtower](https://containrrr.dev/watchtower/) to automatically keep docker containers updated, but that is outside the scope of this guide. ## Bonus screenshots **Spoolman UI - Spools** 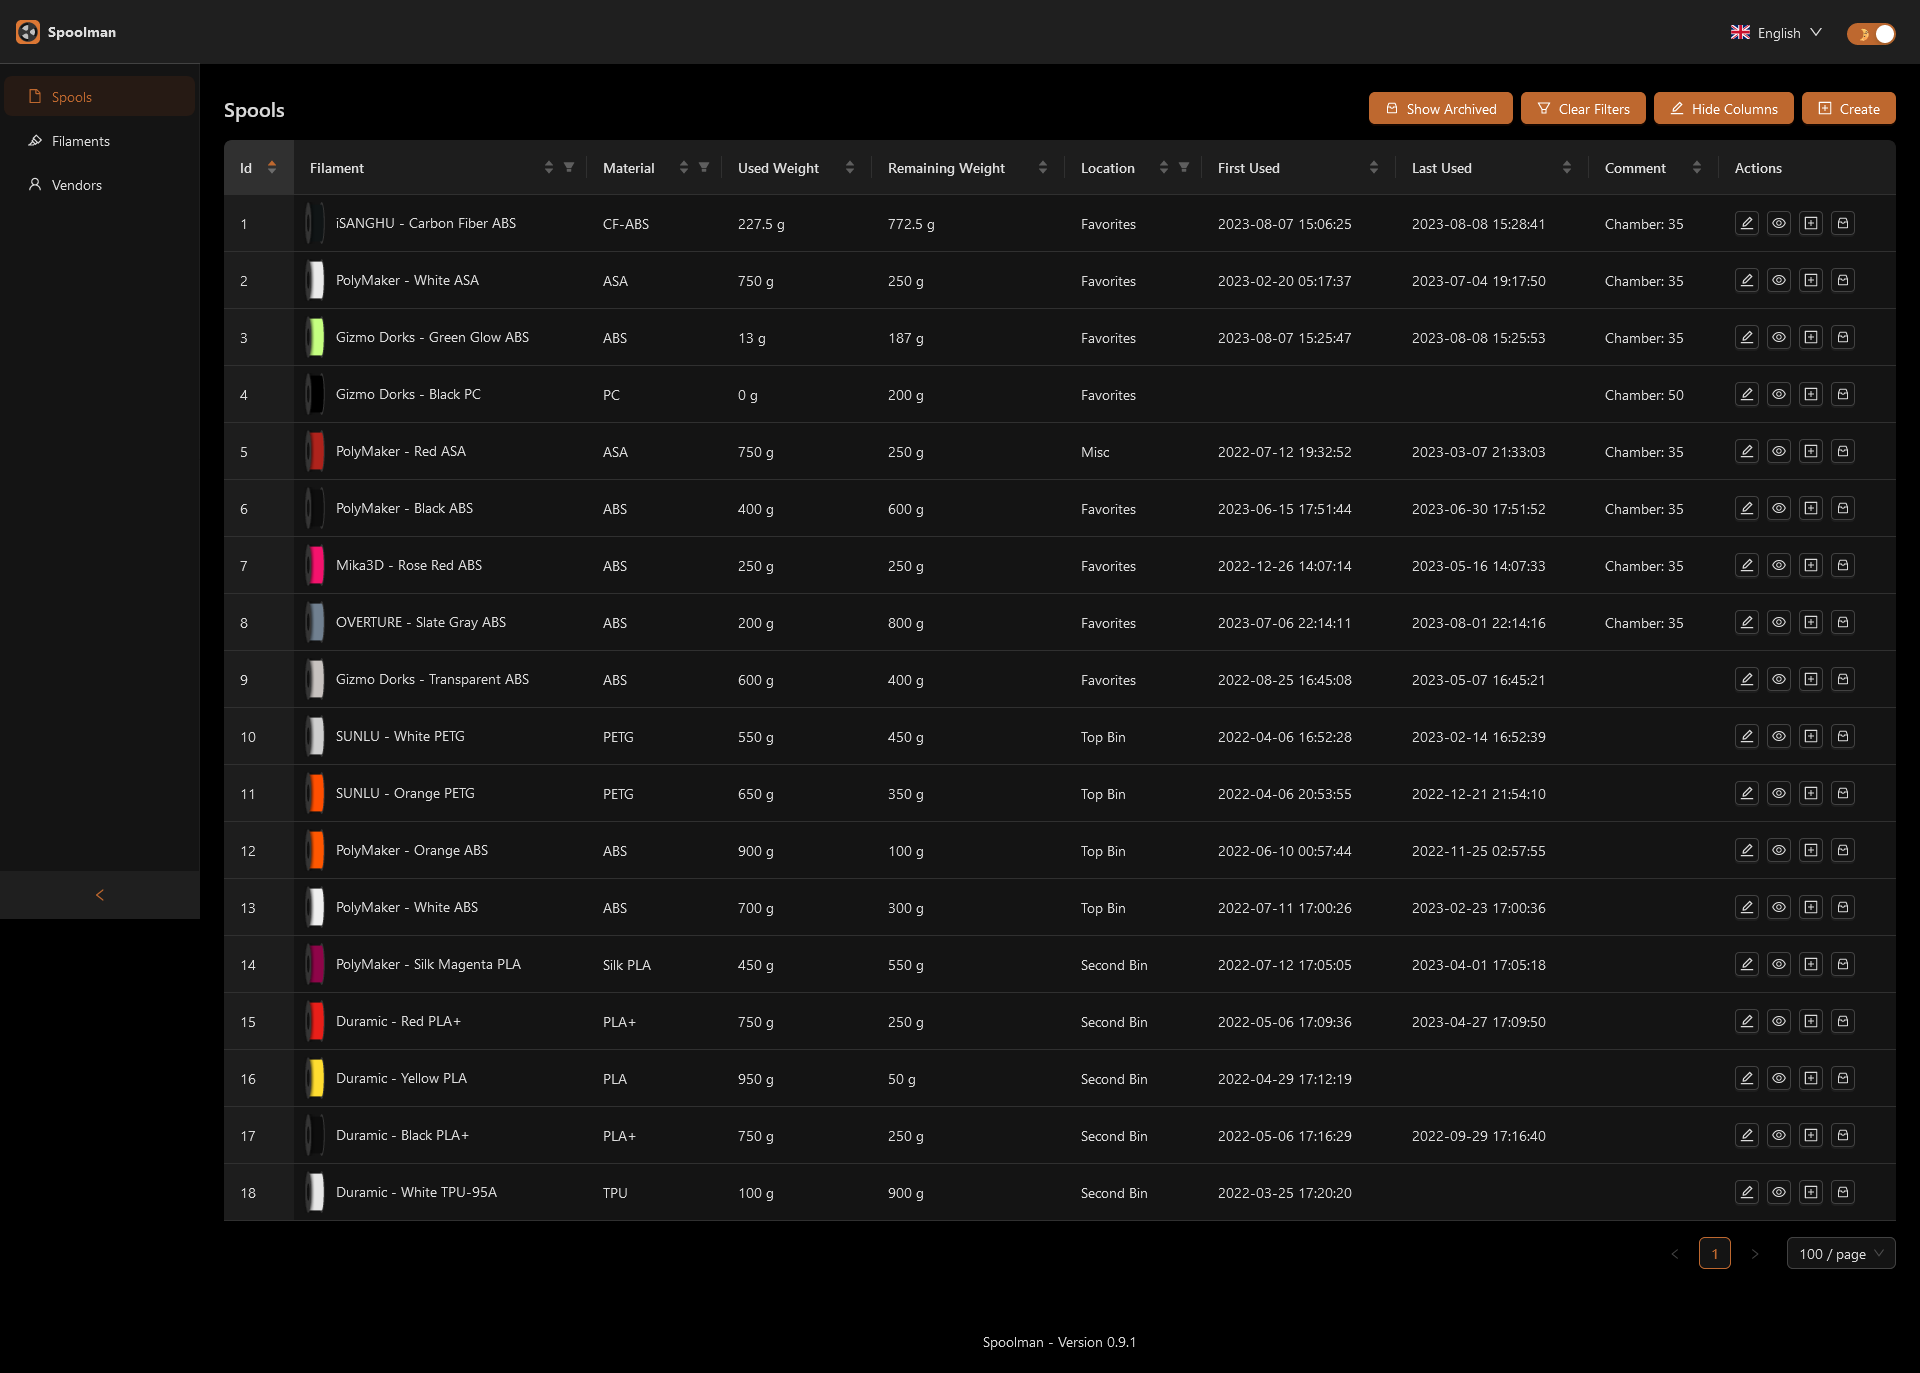 **Fluidd UI - Spool Widget** 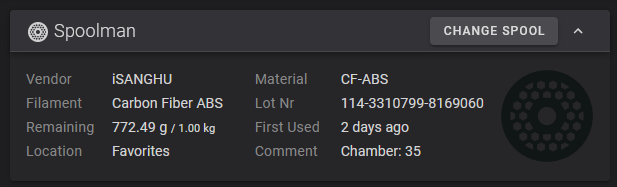 **Fluidd UI - Spool Selection Dialog** 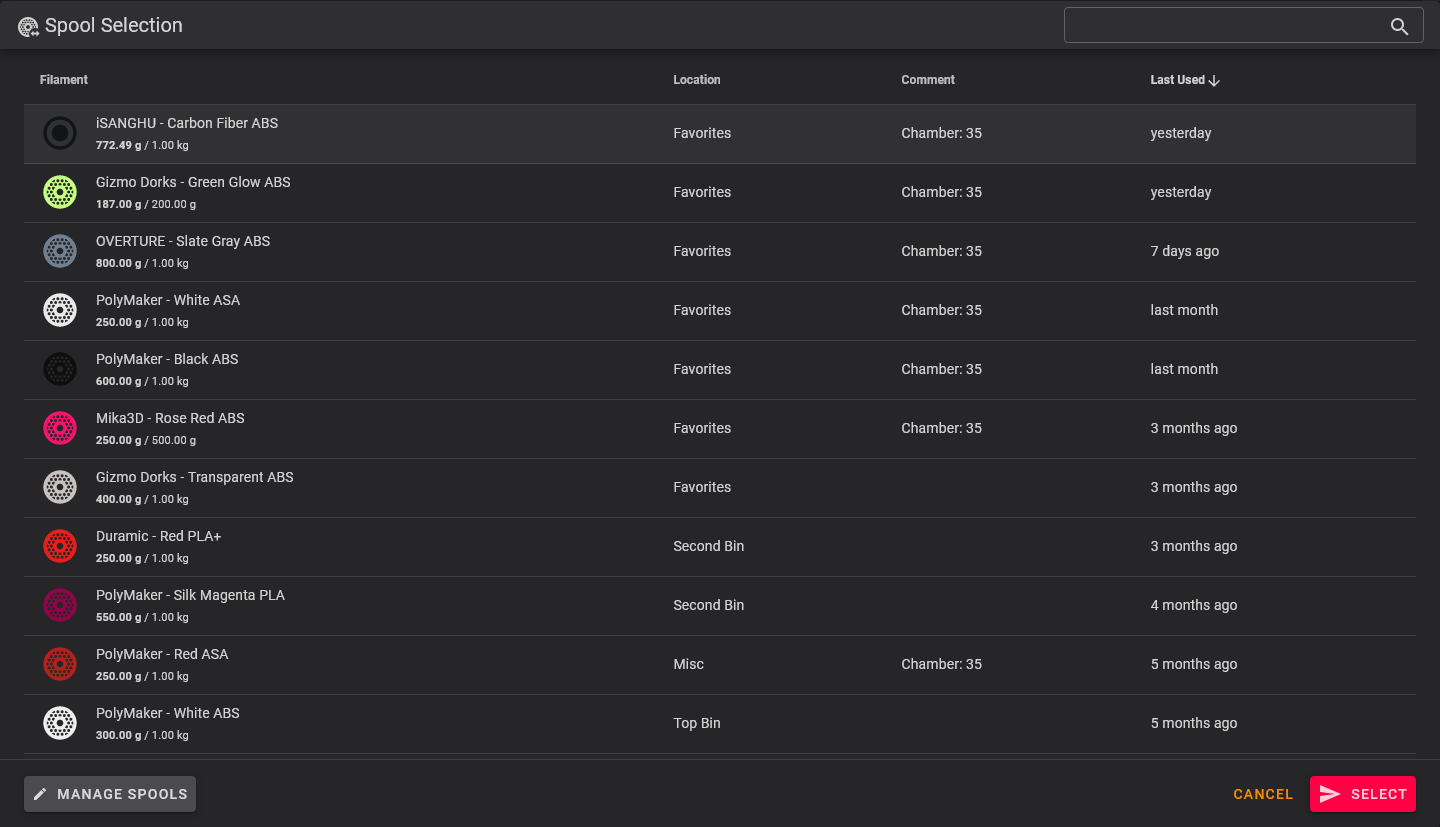 ## Conclusion I hope this little guide helps anyone interested in trying out spoolman, its a great tool that fulfills a function in Klipper that I've been looking for for a while, and it does so very well! I just want to reiterate, **this is not my project**. I am just a Klipper fan who wanted to get the word out on what I think is a really great project that a lot of Klipper users may like. That said, I hope my guide can help those users give it a try! And if you have any trouble, or just questions/concerns, leave a comment below and I will do my best to help!
Hi everyone, I have Crowsnest pre-install but it's broken. I'm unable to have a log... What I'm doing wrong please?
Hi, Actually I use octoprint + marlin and think about changing to Klipper. I understand that with Klipper, main calculs are made in the Raspberry PI. But what about Cura? Isnt' Cura who lead the gcode and then the printer movements? Thank by advance.
Here's a quick and dirty Getting Started guide for those newly considering Klipper. I highly recommend you do further reading and familiarize yourself more with how Klipper works before jumping right in, but this is a basic outline of the setup process: ## Getting Started Guide for Klipper Firmware Klipper is a 3D printer firmware that offloads the processing power to a separate computer, such as a Raspberry Pi, while using the printer's existing electronics for low-level control. This guide will walk you through the process of getting started with Klipper firmware on your 3D printer. **Note:** This guide assumes you have basic knowledge of 3D printers and their components. It also assumes you have a compatible printer and a computer (Raspberry Pi or similar) available. 1. **Prepare the Hardware:** - Ensure you have a compatible printer that supports Klipper firmware. Check the Klipper documentation or community forums for a list of supported printers. Virtually any printer which works on Marlin should work on Klipper. - Obtain a computer, traditionally a Raspberry Pi, to run the Klipper Host software. You'll need to install the Klipper Host software on this computer and connect it to your printer's control board. It's best to use a dedicated Linux computer for this, not a shared computer that will be used for other tasks. 2. **Install the Required Software:** - Set up your Raspberry Pi (or other dedicated computer) with a Linux distribution such as Raspbian or Ubuntu. - Install the Klipper/etc using [KIAUH](https://github.com/th33xitus/kiauh) - Alternatively, use a premade OS like [MainsailOS](https://docs-os.mainsail.xyz/). 3. **Connect the Hardware:** - Power off your printer and unplug it from the power source. - Identify the serial connection on your printer's control board, usually labeled "Serial" or "UART." - Connect the Raspberry Pi to the control board using a USB cable or appropriate connectors. - Double-check the connections and ensure they are secure. 4. **Flash the Firmware:** - Following [the instructions in the Klipper docs](https://www.klipper3d.org/Installation.html#building-and-flashing-the-micro-controller), compile the Klipper firmware by running the appropriate command on the Raspberry Pi. - Transfer the compiled firmware file to your printer's control board using an sdcard or usb flashing process. This will be the same process as you used to flash Marlin. 5. **Configure Klipper:** - Create or modify the `printer.cfg` file to configure your specific printer. This file defines parameters like stepper motor settings, endstop configurations, and thermistor values. Refer to the Klipper documentation for guidance on configuring `printer.cfg`. - [Many sample configs are available on the klipper github](https://github.com/Klipper3d/klipper/tree/master/config) or your board manufacturer's github page. 6. **Setting MCU ID** - Once you have acquired your sample config, you will need to update the mcu id. For usb devices this will be the value for `serial:` under `[mcu]` - Connect the printer to your host and turn it on. - Run this command from SSH/terminal: `ls /dev/serial/by-id/*` - You should see an ID in the output, that is your `serial:` value. - If you get a "File or folder not found" error, that means no id was found and you should backtrack and repeat the previous steps. 7. **Test and Calibrate:** - Power on your printer and connect to the Klipper firmware through your chosen web interface (Mainsail/Fluidd/etc) - If all goes well you should see a "Ready" state from the printer. - Perform calibration procedures, such as bed leveling, PID tuning, and steps per millimeter calibration, to ensure accurate prints. The Klipper documentation provides detailed instructions for these procedures. - [Ellis' Print Tuning Guide](https://ellis3dp.com/Print-Tuning-Guide/) is a great resource for further calibration 8. **Customize and Fine-tune:** - Explore the Klipper configuration options to customize your printer's behavior and optimize its performance. The configuration file allows you to fine-tune various settings and enable advanced features. - Join the Klipper Discord, Lemmy, or other online communities to seek help, share experiences, and learn from other Klipper users. ## Congratulations! You have successfully started using Klipper firmware on your 3D printer! Enjoy the enhanced performance, flexibility, and advanced features that Klipper brings to your printing experience. Remember to refer to the Klipper documentation for in-depth explanations, troubleshooting, and updates. Happy printing!
There didn't seem to be a klipper community yet, so I made one. I personally am fairly active on the Klipper discord and previously on the klipper subreddit. Here are some Klipper links to get you started: # Klipper - [Klipper3d](https://www.klipper3d.org/) - The Klipper documentation. - [Config Reference](https://www.klipper3d.org/Config_Reference.html) - This document is a reference for options available in the Klipper config file. - [G-code Commands](https://www.klipper3d.org/G-Codes.html) - This document describes the commands that Klipper supports. - [Status Reference](https://www.klipper3d.org/Status_Reference.html) - This document is a reference of printer status information available in Klipper macros, display fields, and via the API Server. - [Command Templates](https://www.klipper3d.org/Command_Templates.html) - This document provides information on implementing G-Code command sequences in gcode_macro (and similar) config sections. # Companion software - [Moonraker Config Reference](https://moonraker.readthedocs.io/en/latest/configuration/) - This document describes Moonraker's full configuration. - [Mainsail Docs](https://docs.mainsail.xyz/) - Documentation for Mainsail Web UI - [Fluidd Docs](https://docs.fluidd.xyz/) - Documentation for FluiddWeb UI - [KlipperScreen Docs](https://klipperscreen.readthedocs.io/en/latest/) - KlipperScreen is a touchscreen GUI that interfaces with Klipper via Moonraker.
Klipper
!klipper@lemmy.worldA community for discussion of the Klipper firmware for 3d printers.
Here are some Klipper links to get you started:
Klipper
- Klipper3d - The Klipper documentation.
- Config Reference - This document is a reference for options available in the Klipper config file.
- G-code Commands - This document describes the commands that Klipper supports.
- Status Reference - This document is a reference of printer status information available in Klipper macros, display fields, and via the API Server.
- Command Templates - This document provides information on implementing G-Code command sequences in gcode_macro (and similar) config sections.
Companion software
- Moonraker Config Reference - This document describes Moonraker's full configuration.
- Mainsail Docs - Documentation for Mainsail Web UI
- Fluidd Docs - Documentation for FluiddWeb UI
- KlipperScreen Docs - KlipperScreen is a touchscreen GUI that interfaces with Klipper via Moonraker.